Scanning negatives and slides using the Nikon LS 2000 scanner
The Nikon LS 2000 for 35mm film is a high speed, high-resolution scanner capable of producing images suited to a wide variety of tasks. The scanner is designed to accept strips of film or slides and the software is accessible from within Photoshop.
Choose the image or images you wish to scan and follow the procedure below.
1. Launch Photoshop. Choose File >Import >Nikon Scan 3
2. Insert the negative strip emulsion side down into the scanner. The
first negative inserted into the scanner will appear as #1 on the display
window.
3. If Tool Palette 1 is not showing in the display, bring it up by clicking
the tools button, then choose Tool Palette 1.
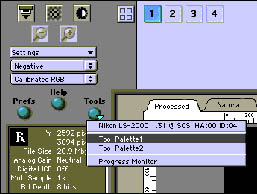
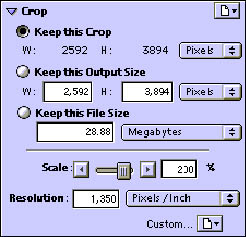
4. Slide the scale slider in Tool Palette 1 all the way to the right and make sure that the file size shows as 28.88 MB. Unless you are preparing images for the web or for emailing, scan at the highest resolution for now.
5. In the top of the main window on the right side, click the blue box with the number that corresponds to the negative to be scanned. Remember, the first negative in is #1 on the display.
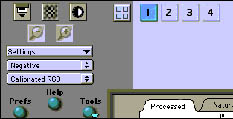
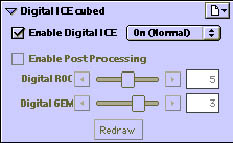
6. In Tool Palette 1 twirl down the Digital ICE cubed triangle. Make sure
the box labeled Enable Digital ICE is checked if you are scanning color
film. Uncheck the box if you are scanning black and white film.
7. Below the settings drop down menu at the top of the dialog, choose either negative for film, or positive for slides. Then choose Calibrated RGB for color film (or slides) or choose grayscale for black and white film. If you are scanning color film with the intension of printing a black and white image later, scan in color anyway. When you scan in grayscale, it only uses the red channel. You can do a better job of converting to grayscale yourself in Photoshop.
8. Click the preview button and the scanner previews the image in the scanner window. It takes about a minute for the preview to appear.
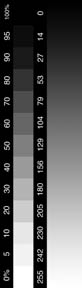
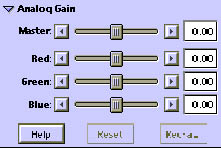
9. If the shadows are too dark, or the highlights are too light, twirl down the Analog Gain triangle in Tool Palette 1. Move the Master Gain slider to the right (positive values) to lighten, or to the left (negative values) to darken the scan. Push the preview button again to see the result. Don't be afraid to experiment to get the results you want. See illustration below.
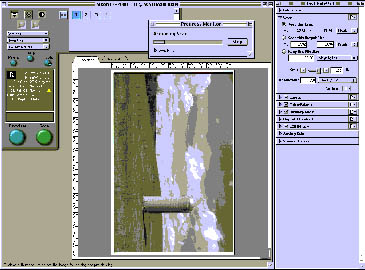
10. Once satisfied with your preview, press the scan button. This will again take about a minute to scan at full resolution. See scanned image below.
11. When the scan is complete, it appears in Photoshop: save the image immediately to your Zip disk. A full sized scan takes almost 30MB of space on the disk. Make sure there is enough available space on the disk. Take the Zip disk out and return to your workstation. In the documents folder of the hard drive, create a folder with your name as the title. Drag a copy of the file from your Zip disk to that folder. Work from the copy on the hard drive rather than from your Zip disk. The computer runs more efficiently with data from the hard drive. When you are finished working for the day, simply save and close your file, then drag a copy of the file onto your zip disk.
Thanks to Professor Don Cyr and Don Eby, Southern Connecticut State University, New Haven, CT, for preparing this guide.